blOenBdeSr
Virtual conferences are popular, but many request a pre-prepared video to explain a paper or a poster. Many conferences suggest using Zoom as means of putting together a short video to explain research. This is acceptable, but with a little bit of setup OBS can produce videos which are better quality and give the presenter much more control over the video’s appearance, and Blender can edit them to cut out pauses, ums and ahs and make it all look slick.
Of course, you might prefer just to jump straight in, present off the cuff and do it all in one take. If you’re an experienced presenter, that’s probably very doable; but for those wanting a bit of polish I’d recommend spending a little time before and after.
The basic setup is:
- prepare your slides in LaTeX or some presentation software
- set up OBS to “Window Capture” the output presentation
- hit record
- talk through the slides as you would normally
- cut out the unnecessary parts in Blender (or another video editor)
Based on my experience with setup and editing, here’s a collection of tips. I’m open to further suggestions!
Prepare Your Material
- Before making a video, make sure your slides are in a suitable format! the popular LaTeX presentation class beamer outputs slides which are 4:3 by default, which would leave bars on a 16:9 (1920×1080 or 1200×720) video. This helpful answer from 2010 explains how to change the aspect ratio:
It looks like current version of beamer supports
aspectratiooption.\documentclass[aspectratio=169]{beamer}
should do exactly that. Other possible values are: 1610, 149, 54, 43 and 32.By default, it is to 128mm by 96mm(4:3).
Alexey Voinov, TeX SE
- Leaving white space is always a good idea, no one enjoys parsing cluttered slides. It’s an even better idea if you plan to include a video of you (or whoever is presenting) talking over the slides- which I would recommend, if you were swithering. Leaving a space in (eg) the lower right for a face camera makes sure important content isn’t overwritten.
Recording Setup
- A laptop webcam is fine, but if you have a standalone camera this may be even better for positioning – slightly above the face is good! DSLRs can also be used as camera sources in a pinch if you have the appropriate cables and/or apps- check if yours can be, manufacturers enabled it for some camera models early on in the pandemic.
- Lighting is important- bright, neutral coloured light is best
- Clear clutter in the background (though see related tip in OBS section)
- For better audio quality, consider using a separate mic- you can get a cheap clip-on lavalier mic and USB DAC for around thirty quid, possibly less — note that both this and the webcam perform great double duty for Zoom meetings
- Figure out a neutral pose and return to it before retakes and before/after slide transitions. Trust me, this will help you look composed, and also make editing easier!
- Leave gaps when you’re re-taking a sentence or paragraph, this also really helps when editing
OBS Setup
- Create a scene for your camera source! OBS can now include a scene within a scene, and having your camera set to your liking in a separate scene is really handy for manipulating it in your presentation scene[s]
- Crop down the camera input- I supplied a fancy camera with a fairly wide field-of-view; but for fitting it in to white space in slides seeing half the room behind you isn’t necessary. It may also help hide some clutter!
- You may want to include your mouse pointer to indicate parts of slides in lieu of a laser pointer. There are options for this in the window capture properties in Linux and Windows version of OBS; as far as I can tell on Macs you need to use display capture to get a cursor.
- Consider creating additional scenes:
- an ‘intro’ scene with a larger face cam so that people have a better shot at recognising you!
- left/right top/bottom scenes with the camera source in a different position if critical information would be occluded and cannot be repositioned elsewhere on the slide
- an ‘outro’ scene
- If you have a noise issue (eg from a laptop fan) with your mic, you can use the noise suppression filter to remove some of it; though it isn’t perfect, and is less effective than obviating the noise another way, such as by using a standalone mic away from the noise source
- (Advanced) If you have suitable material, you could put it behind you and chroma key out your background, and appear as a talking head. I didn’t have a great material for this- tried a purple blanket, a light blue dressing gown (!), a light yellow towel, and spent a great deal of time tweaking values to try and get it right. Frankly, it’s not necessary, and if you want to do this, get a proper green screen- or make one relatively cheaply from PVC pipes and fabric!
Video Editing
- Blender is free and open source, and hugely powerful. The video editing portion of it, Blender VSE (video sequence editor), used to have some significant issues; but these days (Blender 2.93 at time of writing) it is usable ‘out of the box’
- For cutting out unused takes or gaps, the following suggestion from Paul McManus on the Blender Artists forums will probably be your most-used key sequence:
K | K | X [Enter] | [Select right strip] | Shift+SNote: the cursor position after each cut is important to avoid having to do more select/deselect steps than the minimum.
If there are more strips to the right then they will not be moved by this recipe.
https://blenderartists.org/t/is-this-option-available-in-blender-vse/1132045/4
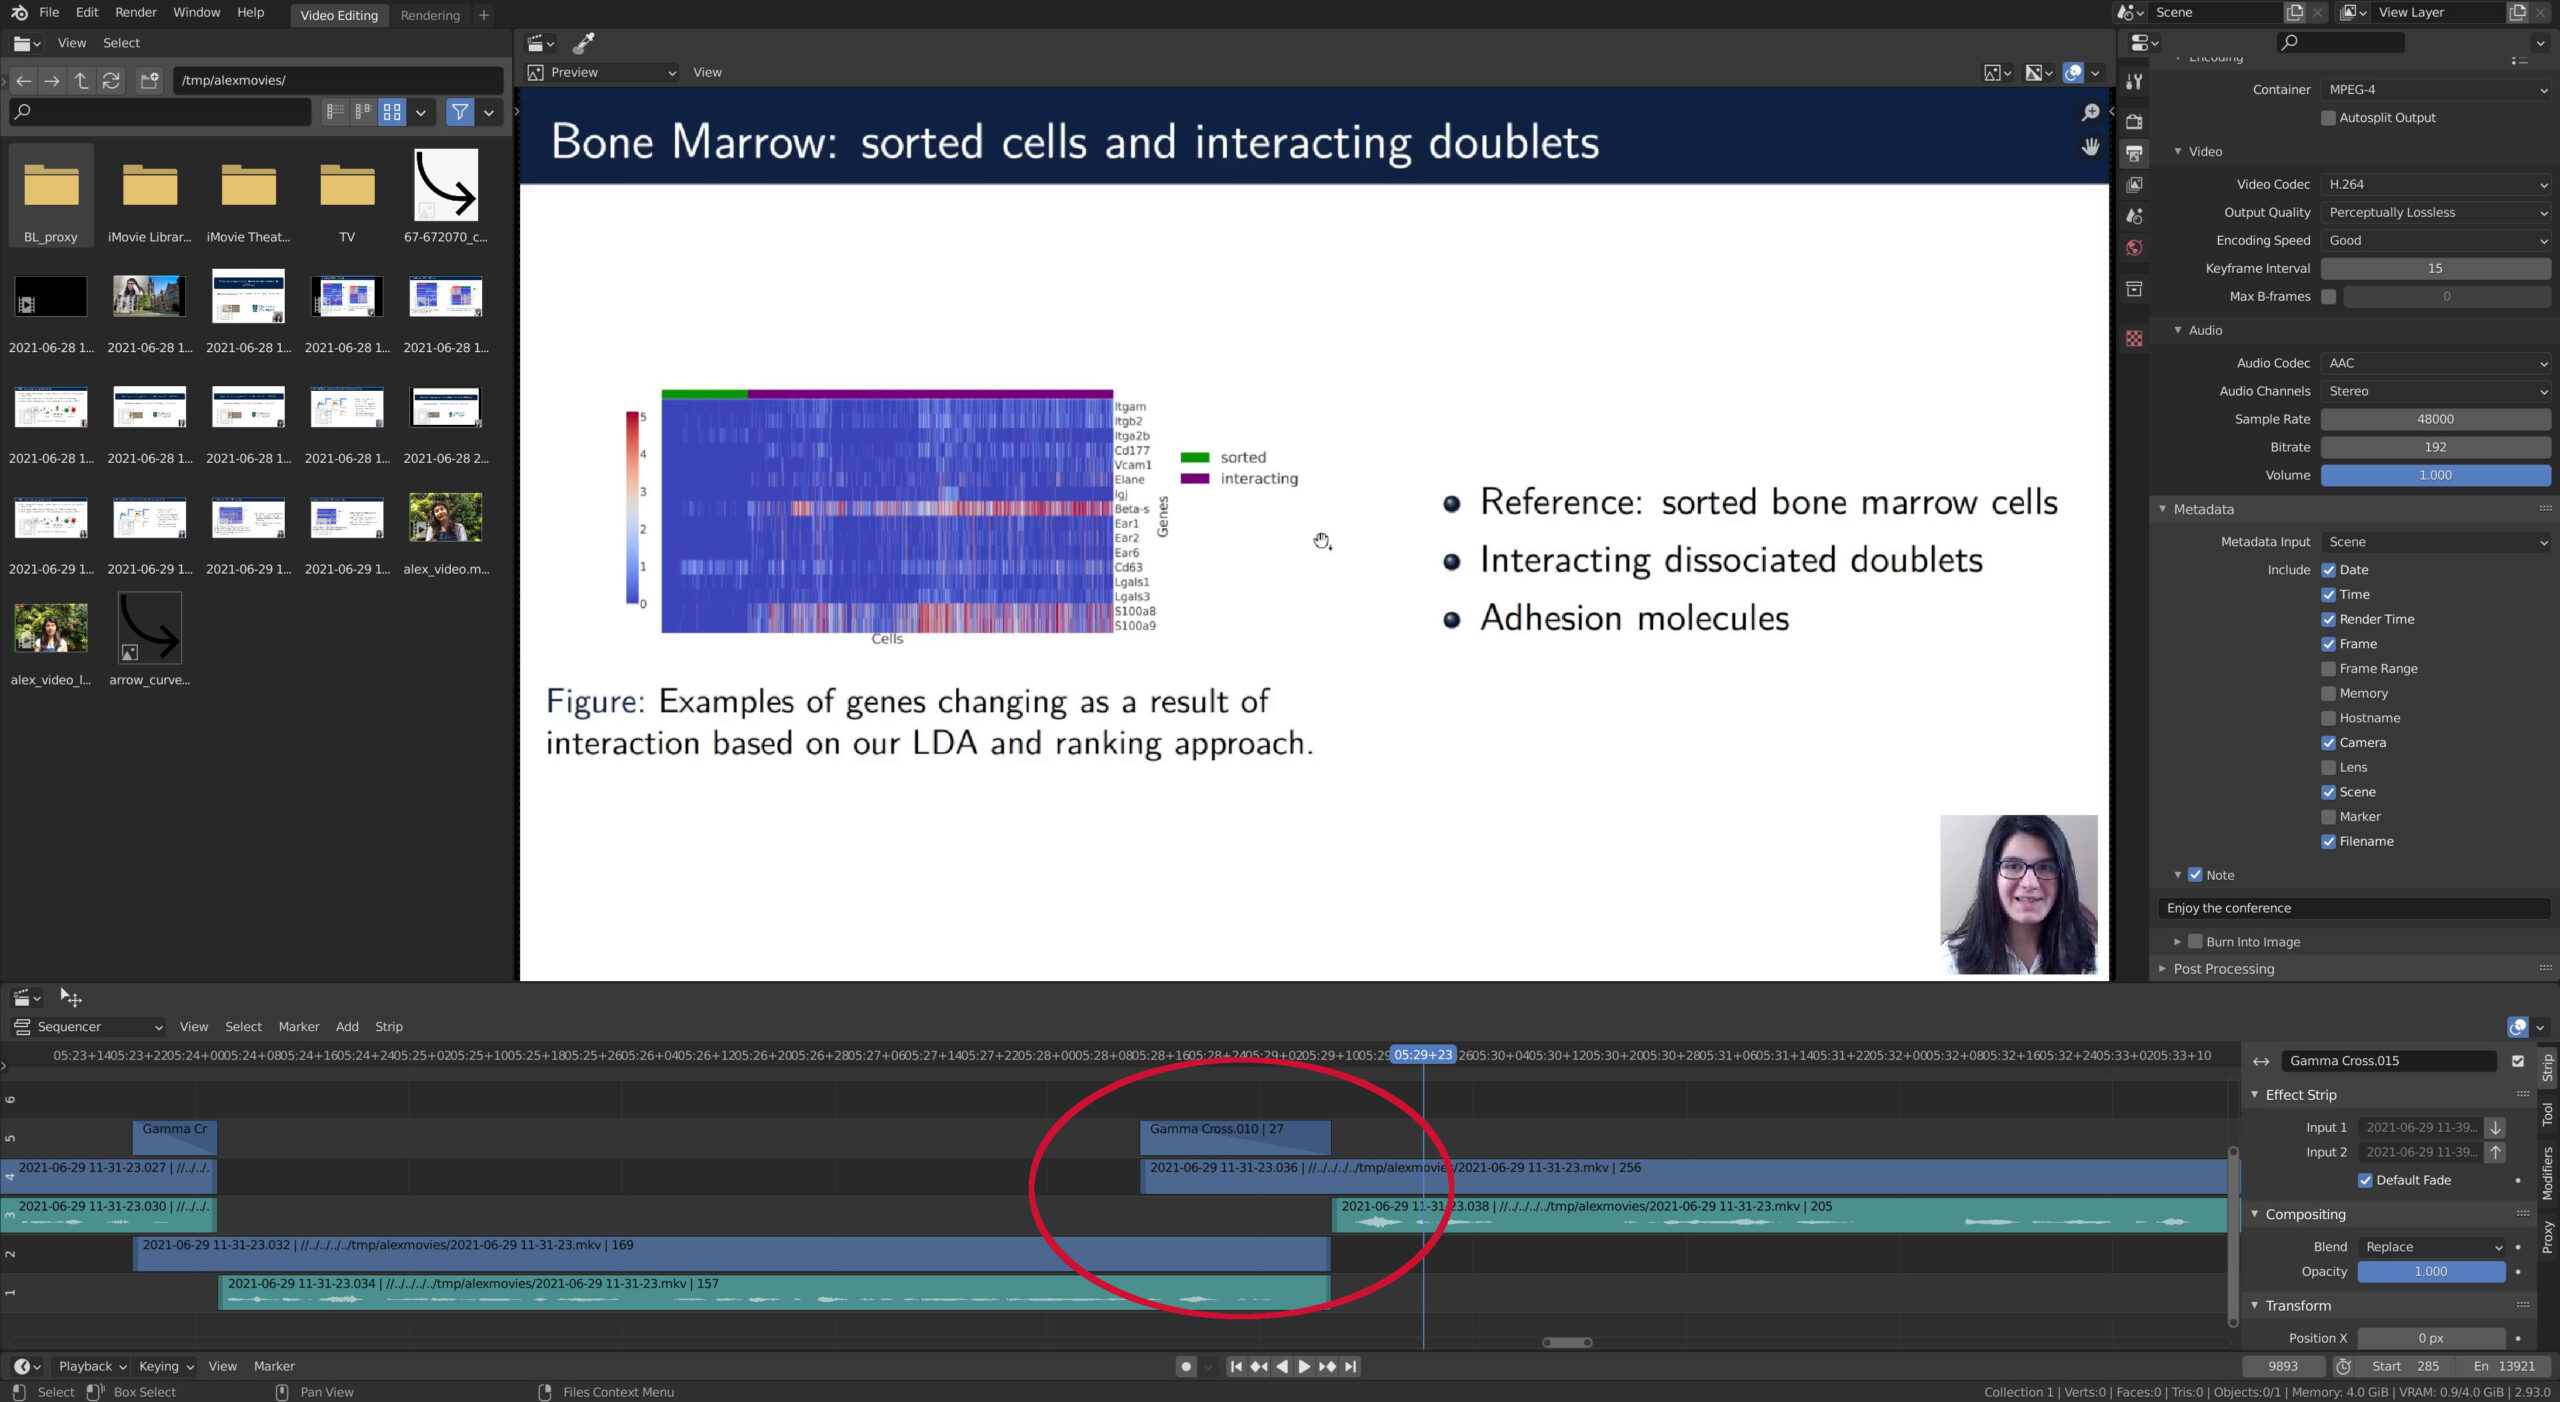
- If your cuts look jarring, consider using a transition (like a gamma cross) to soften it slightly. It won’t look perfect, but thanks to a much much greater familiarity with video calls like Zoom and all their attendant quality issues, it should be mentally filtered out by people watching!
- You can annotate slides to highlight things which people might miss:
The arrows were added as separate tracks with fade in/out
- “We can fix it in post” – notice a critical typo or a figure that needs updated after your video is completed? Don’t re-record just yet! You can use Blender to fix that. (Ask me how I know.)
First I usedpdftoppmto produce a PNG (pdftoppm -rx 600 -ry 600 -f 2 -l 2 ECCB\ (3).pdf slide2 -pngor similar for the slide[s] you want); added an alpha channel; deleted most everything except the bit to be replaced; then inserted the replacement slide parts as a track above the original, adjusting the duration to suit, and selectedAlpha Overcompositing.
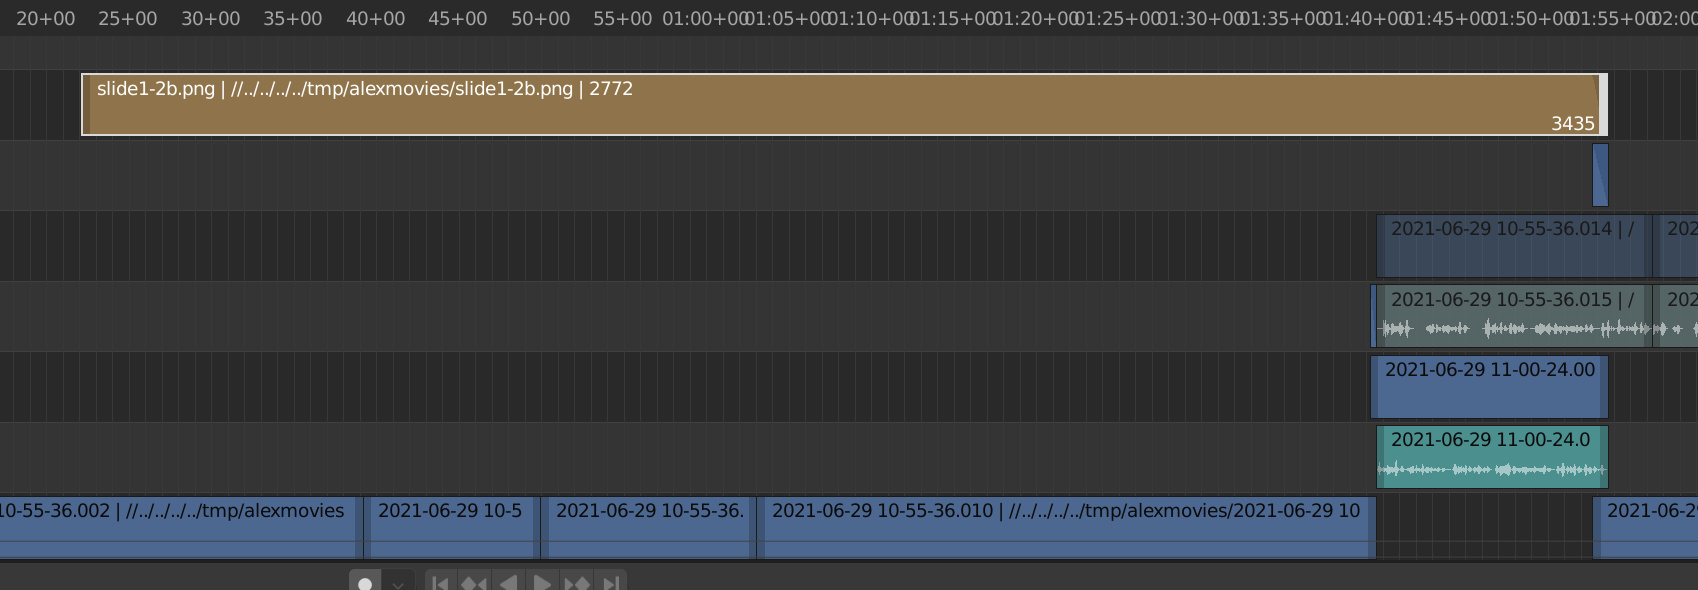
There may well be a slicker way of doing this, but this is what leapt to mind. I still have a partly analogue brain, and conceptually this is a bit like reprinting a part to be physically stuck over the thing that needs updating!
Pass the Pritt stick once you’re done with it.
Pingback: Highlight Videos with Blender: Intro – Rob's Blog