A TV needs a remote
We’ve been putting together an HTPC using a Dell Wyse 3040 thin client PC. The OS, Arch Linux, has been installed along with media applications Kodi and Chromium (to give us Netflix). We also installed Openbox to provide a window manager. Now we need to do a bit of polishing around the edges to give a decent user experience.
Interested in more info on the Wyse 3040? ParkyTowers has a treasure trove of info on the hardware, disassembly, firmware, installing TinyCore Linux, and some further reading. Enjoy!
Using a Remote with FLIRC
The preceding parts get us to a useful state: we turn on the Wyse 3040, and it starts up Kodi and Netflix. We can alt+tab using a plugged in or wireless keyboard (I have a mini wireless keyboard for such occasions).
But really, the user-friendly approach is to use a remote with a TV. Enter FLIRC! This lets us do some real magic using a combination of:
- remote modes
- custom keybindings in openbox
- a simple script or two
with these we can achieve a good ‘ten foot’ user experience using a remote. We’ll deal with basic setup of FLIRC here and leave the scripts and keybindings till next time, as we can achieve a lot with FLIRC alone.
FLIRC: Overview
If you’re unfamiliar with FLIRC, it is basically a device for translating infrared signals to USB inputs.
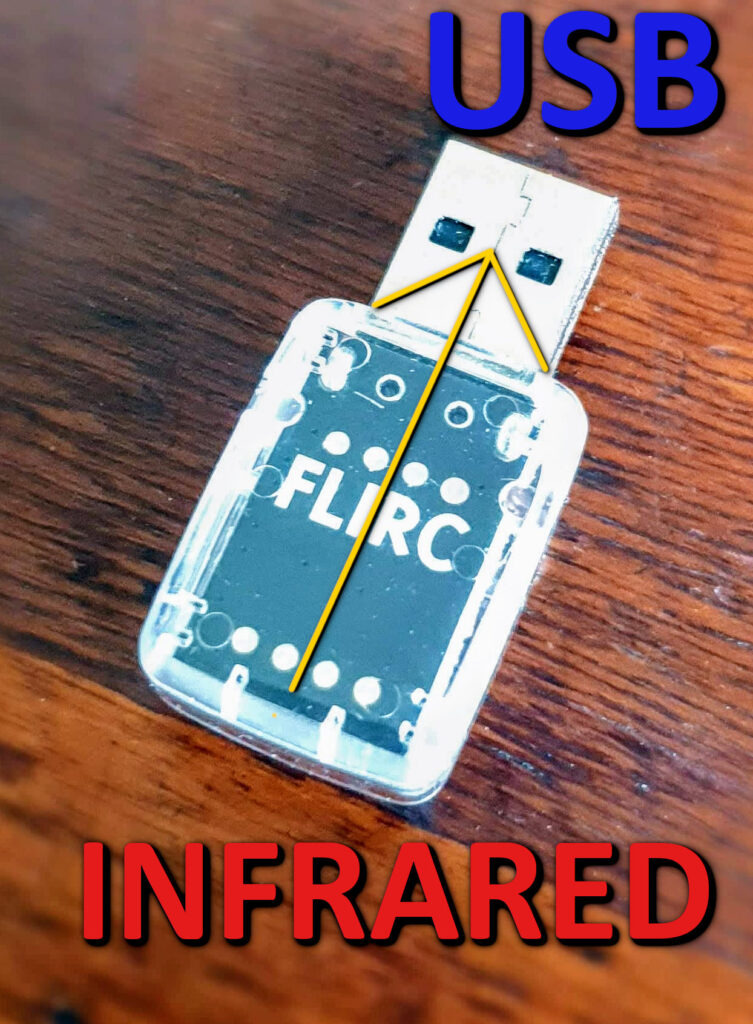
To put it another way: it’s like having a keyboard key pressed for you when you press a button on a TV remote. A long-standing project exists for Linux called LIRC, and the similarity in the names belie a similar purpose. LIRC can do transmission and reception, but we’ll leave that for now.
FLIRC: Configuration
I already had a few FLIRC remotes from way back when, one of which was already configured for use with Kodi.
To set up a remote, connect the FLIRC USB device to a PC, and run their application (Flirc gets the GUI version, flirc_util is the non-interactive console application). The green face in the bottom should confirm you are connected, and you may be prompted for a firmware update.
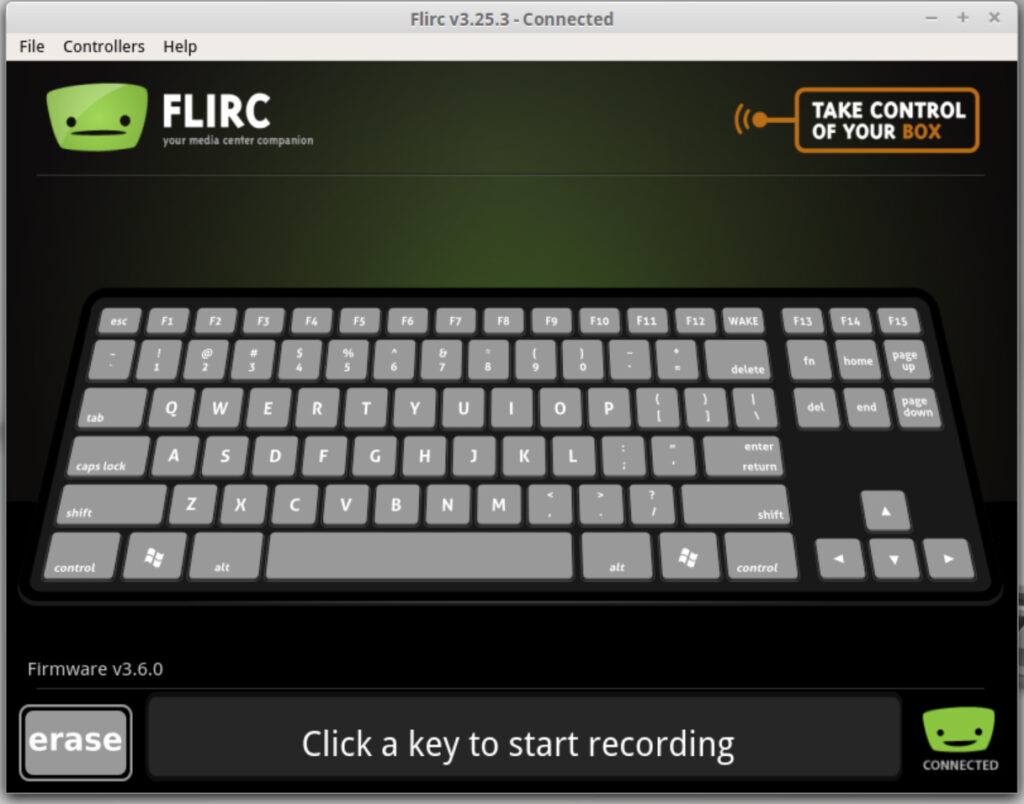
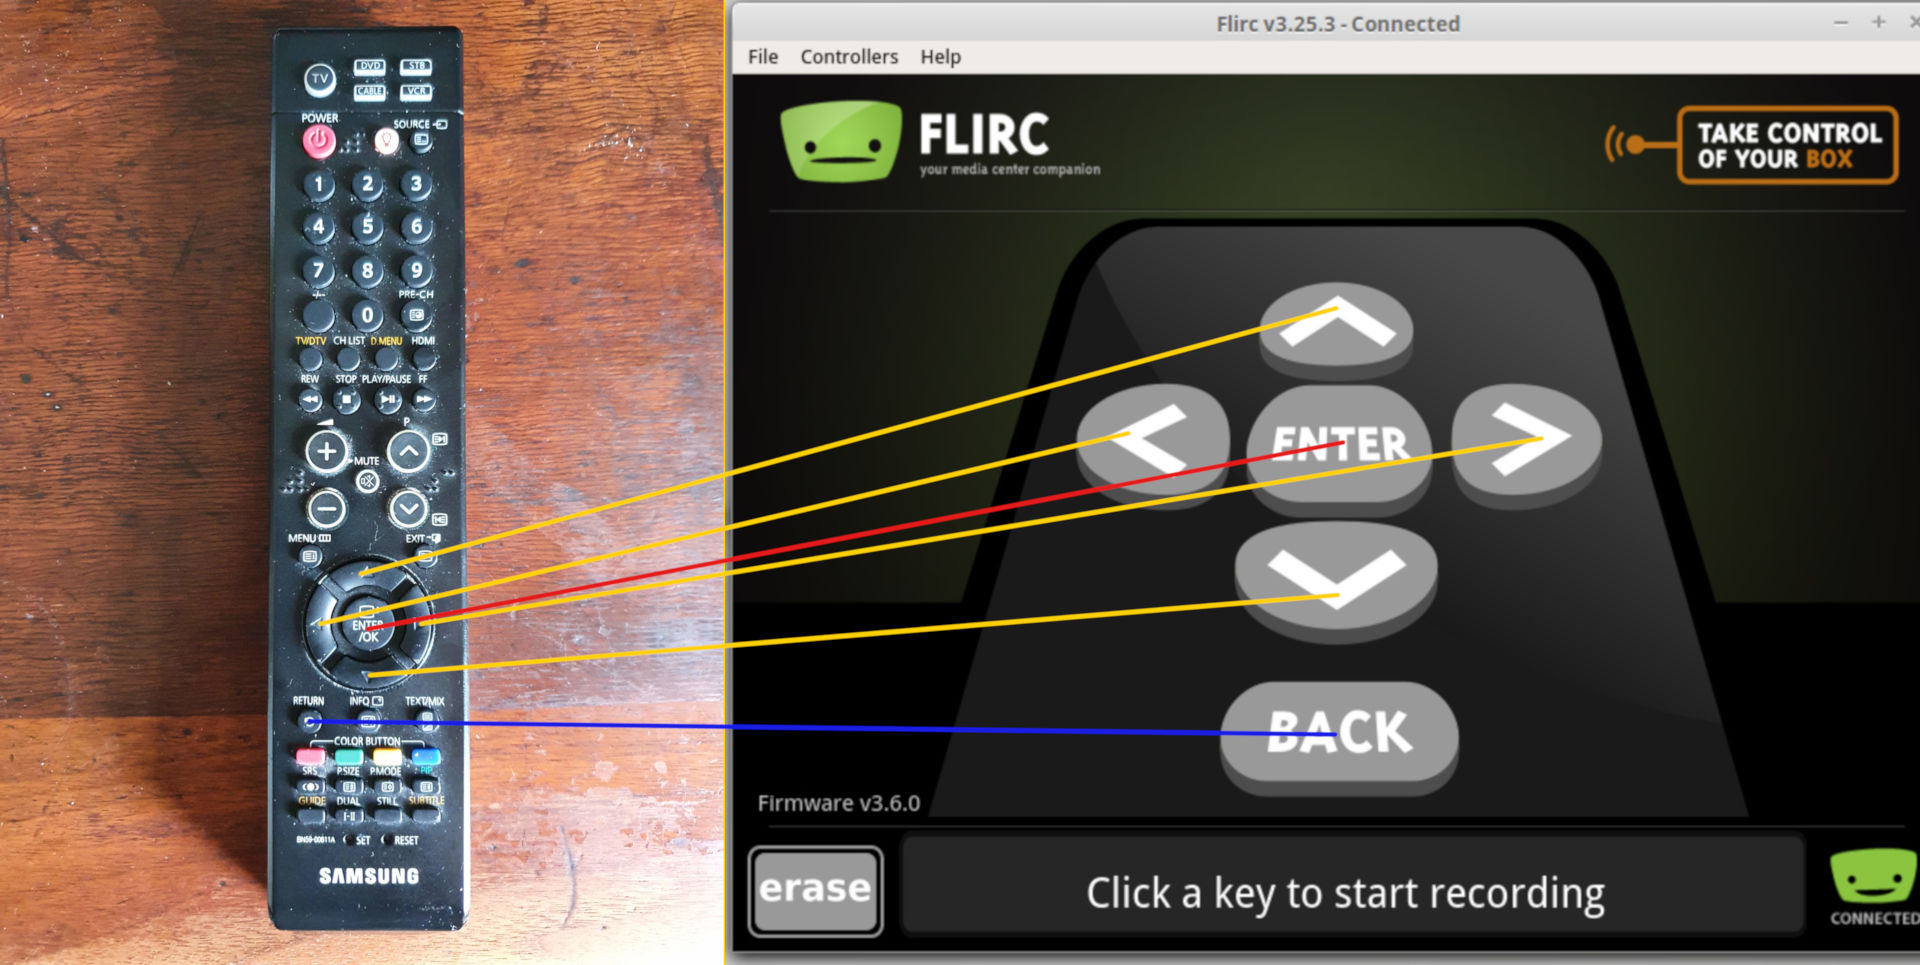
The configuration program is pretty simple: select a controller, click the key you want to map, then press the button on the remote you want to operate that key.
Key combinations can also be mapped, for example to map alt+tab, click the alt key, then tab, then press the button you want on the remote. This lets us switch between Kodi and Netflix!

FLIRC has several ‘controllers’ with useful keys — eg Kodi keys, full keyboard, media keys — and it is useful to know that you can map buttons on a remote across ‘controllers’.
For example, you could map the directional buttons on the remote in the example image above, change the layout in FLIRC to ‘media keys’ and map rewind, stop, play/pause and forward to their media key equivalents.
Remote ‘Modes’
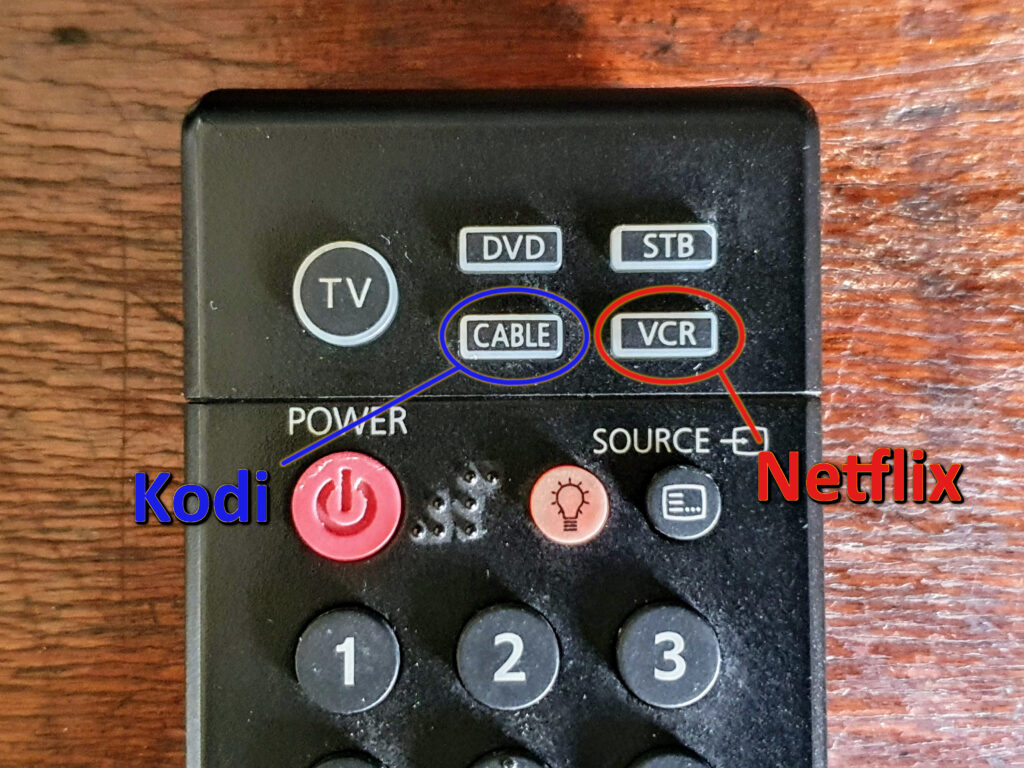
To go with my venerable plasma TV I have the Samsung BN59-00611A remote. For what we are doing, this remote has a very useful feature: it can also control other devices:

In ‘TV’ mode, the remote operates the TV. However, in the other modes — DVD, cable, SB, VCR — the TV ignores the remote. So we can switch modes and bind the same button on the remote to multiple actions.
For Kodi, having (keyboard) arrow keys mapped to (remote) directions is useful for navigation. However, for Netflix in Chromium that binding results in scrolling the page, not moving the selection. Instead, I can map the up arrow to ‘shift-tab’ and the down arrow to ‘tab’ which moves the selection up and down respectively.
There are some drawbacks to this: you have to be in the correct remote ‘mode’ for the application you’re using, and not all buttons on the remote are available in all modes. You might not even have the option to switch modes. In that case, a second remote could be used, or a thrifty approach to mapping to maximise available keys.
With FLIRC configured, the USB device can be removed from the PC and attached to the HTPC, preferably where it has line-of-sight to the remote. I used a USB extension cable for this:
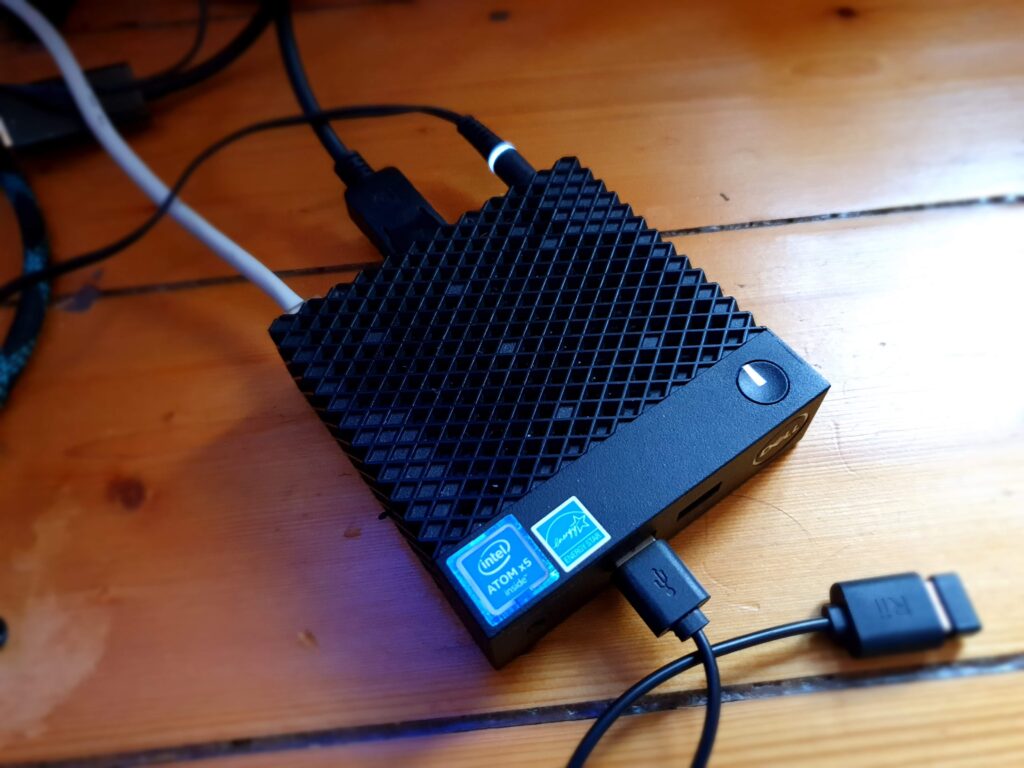
the USB extension is the middle black cable plugged into the back of the Wyse 3040.
We’re nearly there. Next time, we’ll use a script and some keybindings to set up some useful actions.
Alas there was no next time. 🙁
Quite so! ‘Next time’ is still in a semi-draft state; it was going to be about setting up lirc / controlling things like TV and a sound receiver with IR, but the thing I got didn’t work. Other refinements turned out to be unnecessary too- it’s in that state of “good enough for what I use it for” that other things are getting the time and attention. I may revisit, we shall see 🙂
Pingback: Turning a Dell Wyse 3040 into an HTPC (Part 5) – Rob's Blog
@bonelifer: But it turns out there is a next time after all! https://blog.roberthallam.org/2022/07/turning-a-dell-wyse-3040-into-an-htpc-part-5/